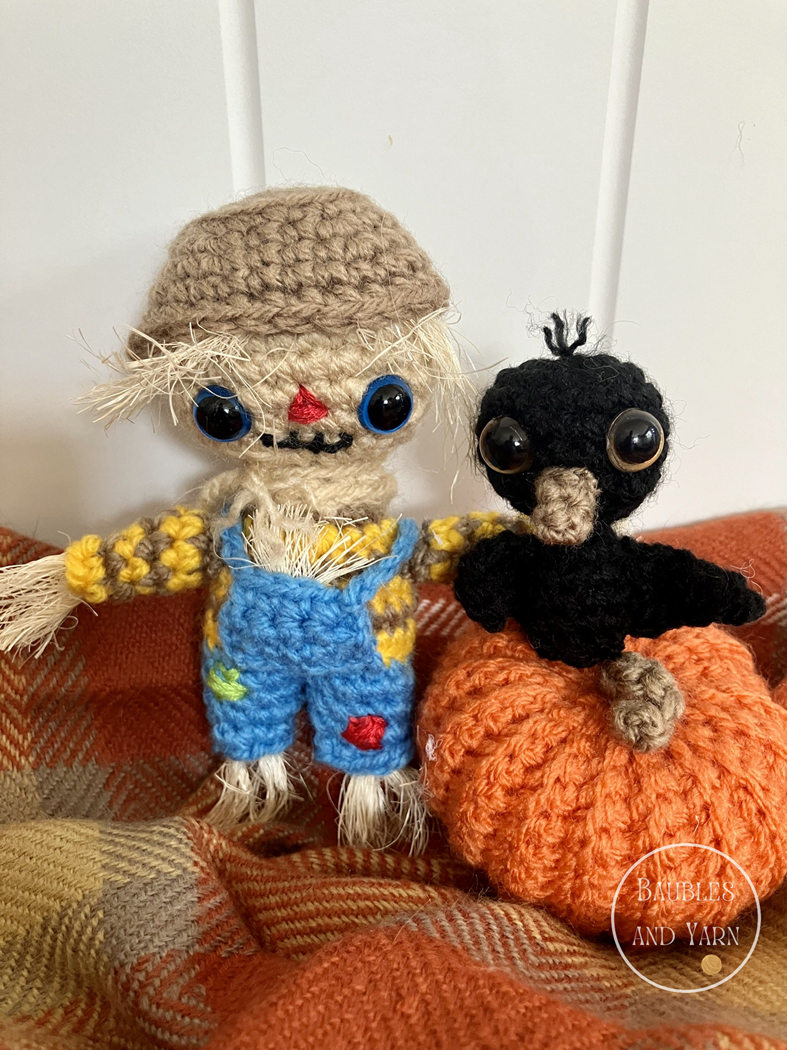
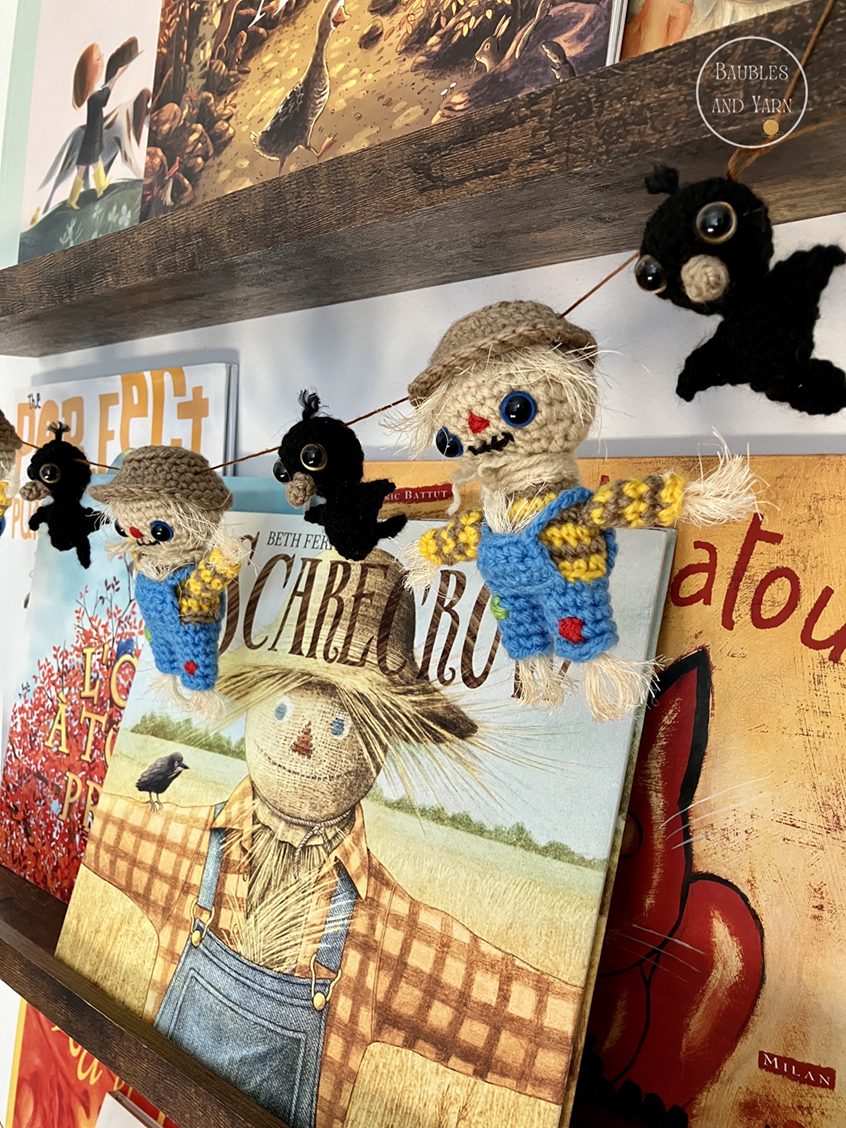
If you caught some of my previous posts, you know how much joy it brings me to decorate and create themed bookshelves. From dinosaurs, to food, to every season, it is so much fun to change up this space and create a little bit of magic. I especially love decorating the shelves with handmade items that I have crocheted. I was so inspired by one of our favourite Fall books, The Scarecrow written by Beth Ferry, that I created a garland of scarecrows and crows inspired by the gorgeous illustrations of the Fan Brothers. If you love these unlikely friends as much as I do, I am so happy to share the free patterns I have designed which are perfect for any fall decor. These patterns include details instructions as well as pictures and are beginner friendly too. I hope this fall scarecrow and crow amigurumi crochet pattern will warm up your heart, just like the beautiful book.
Scarecrow Crochet Pattern
Materials:
- 3mm hook
- 10mm safety eyes
- Beige, brown, yellow, and blue yarn. I used light (3) acrylic yarn.
- Black, red, and green embroidery thread. (You can also use regular yarn).
- Stuffing material
- Scissors
- Needles
- Stitch marker
- Hay (I used sisal rope, but you can also use hay or yarn).
- Glue gun & glue
Finished size: Approx. 12cm tall.
Terms and abbreviations (US Terms):
- Chain (ch)
- Single crochet (sc)
- Increase (inc)
- Decrease (dec)
Head:
Round 1: In beige, 6 sc in a magic circle. (6)
Round 2: Inc around. (12)
Round 3: (1 sc, 1 inc) repeat around. (18)
Round 4: (2 sc, 1 inc) repeat around. (24)
Round 5: (3 sc, 1 inc) repeat around. (30)
Rounds 6-8: Sc around. (30)
Round 9: (3 sc, 1 dec) repeat around. (24)
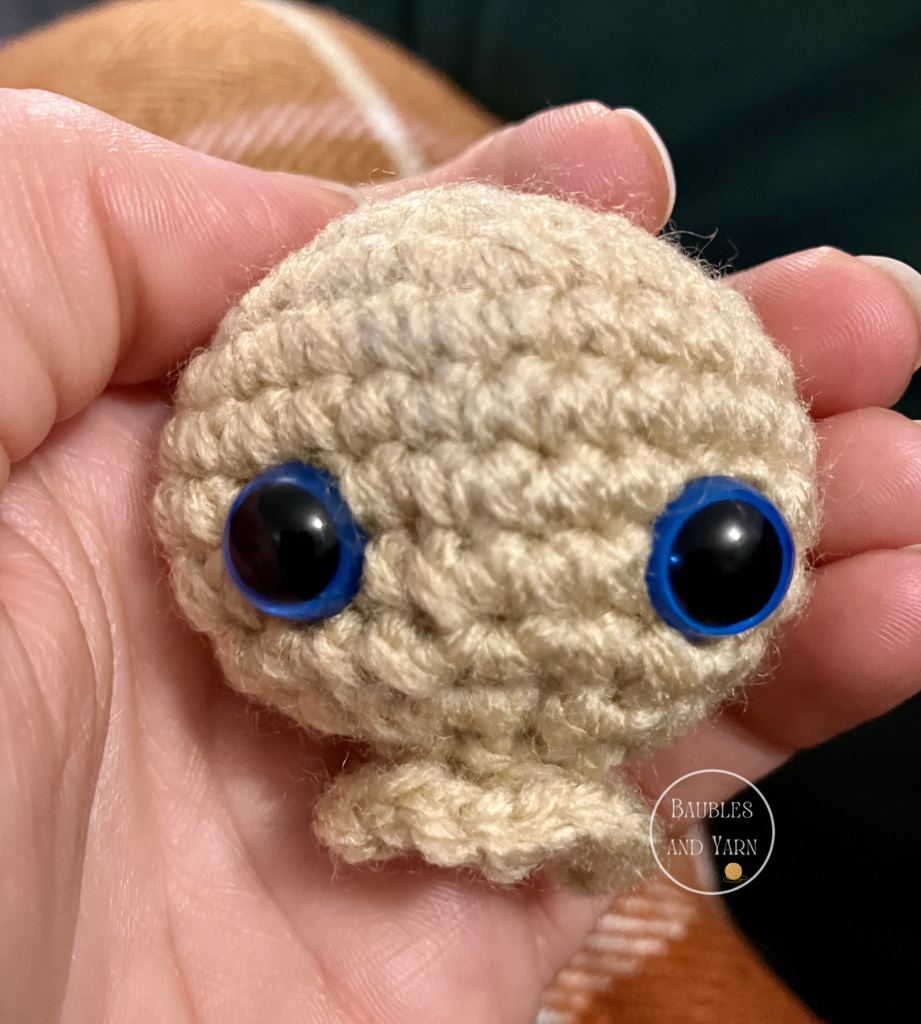
Insert eyes to the front of the head, between rows 8 and 9, about 7 stitches apart.
Round 10: (2 sc, 1 dec) repeat around. (18)
Round 11: (1 sc, 1 dec) repeat around. (12)
Stuff head.
Round 12: Dec around. (6)
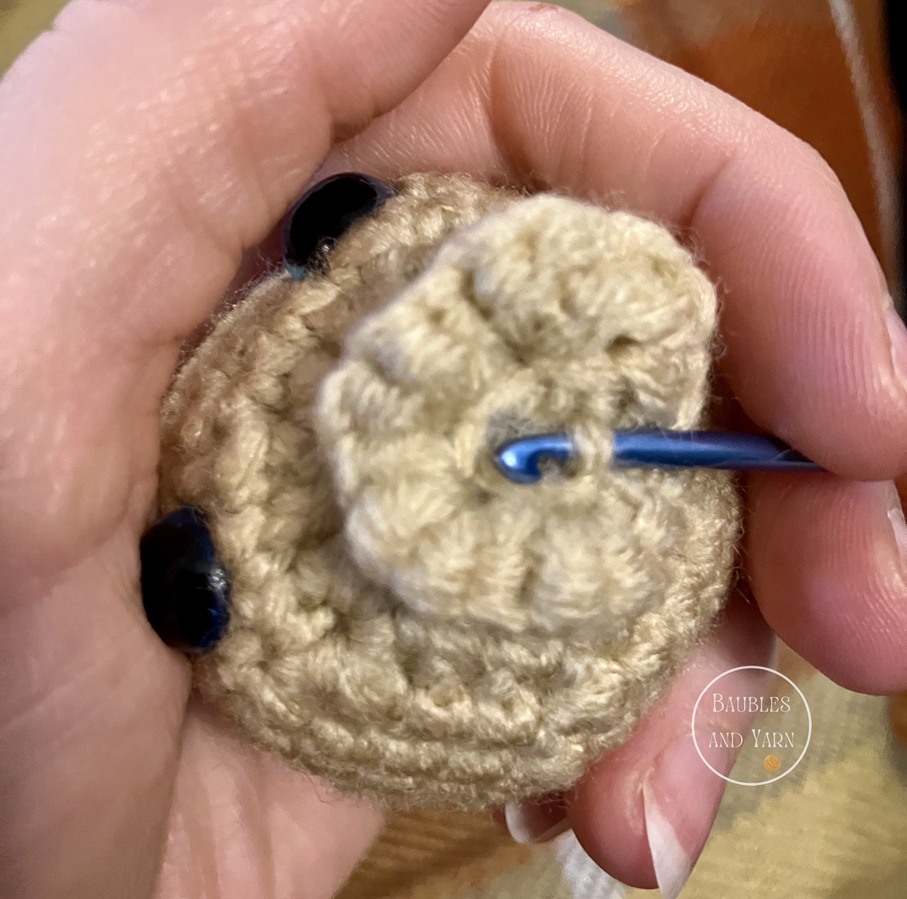
Round 13: In the front loops only, 3 sc in each stitch. Cut and tie off.
Body:
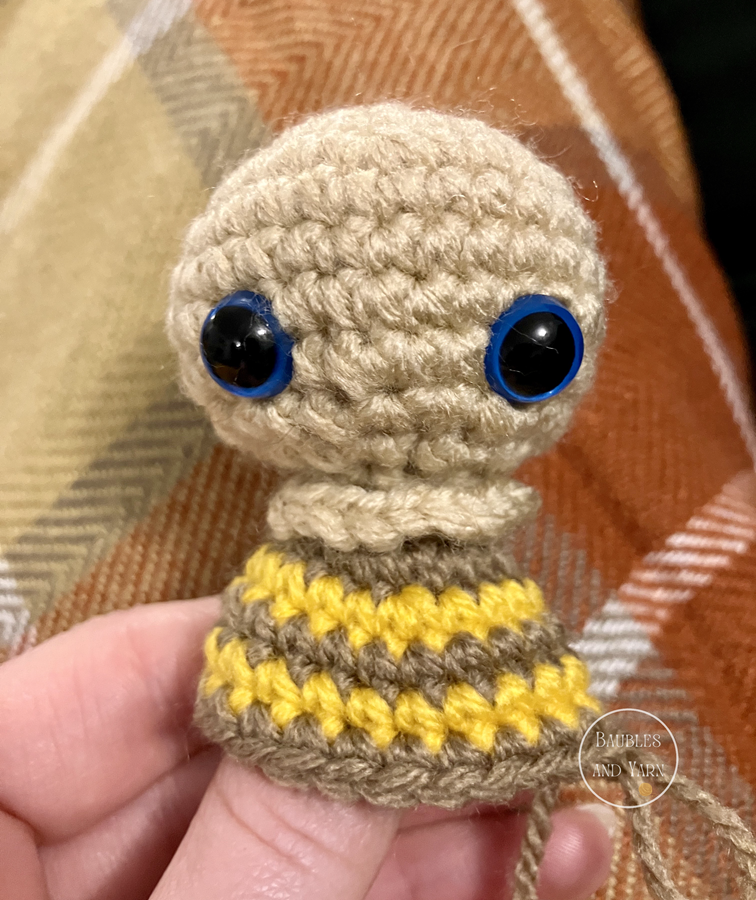
Round 14: Join beige yarn in the back loops created by row 13 and inc around. (12)
Round 15: In brown, (1 sc, 1 inc) repeat around. (18)
Round 16: In yellow, (1 inc, 5 sc) repeat around. (21)
Rounds 17-19: Alternating between brown and yellow yarn, sc around. (21)
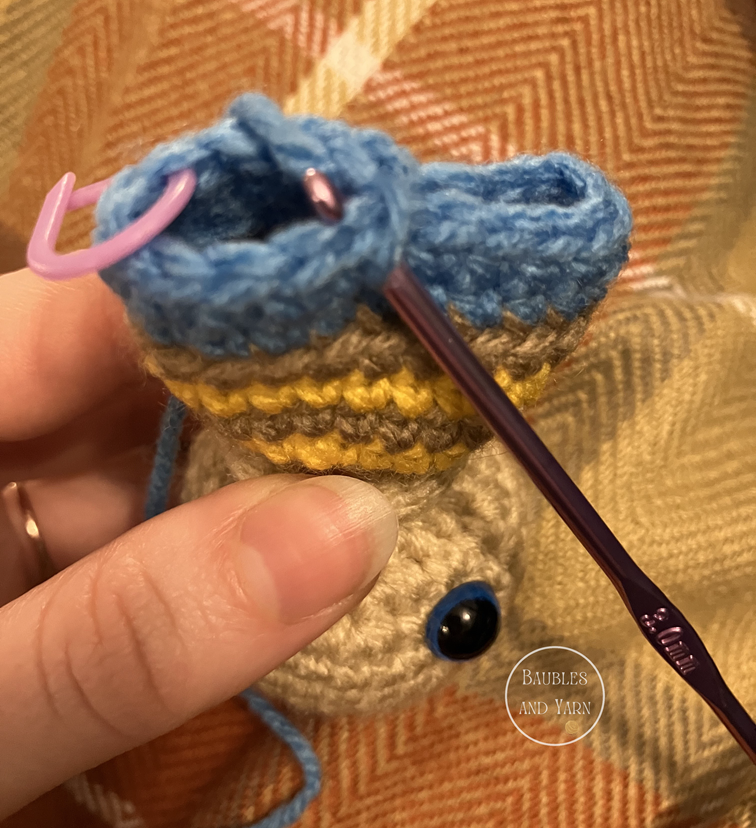
Round 20: Join blue yarn, in the back loops only, sc around. (21)
Round 21: 1 dec, 19 sc. (20)
Legs:
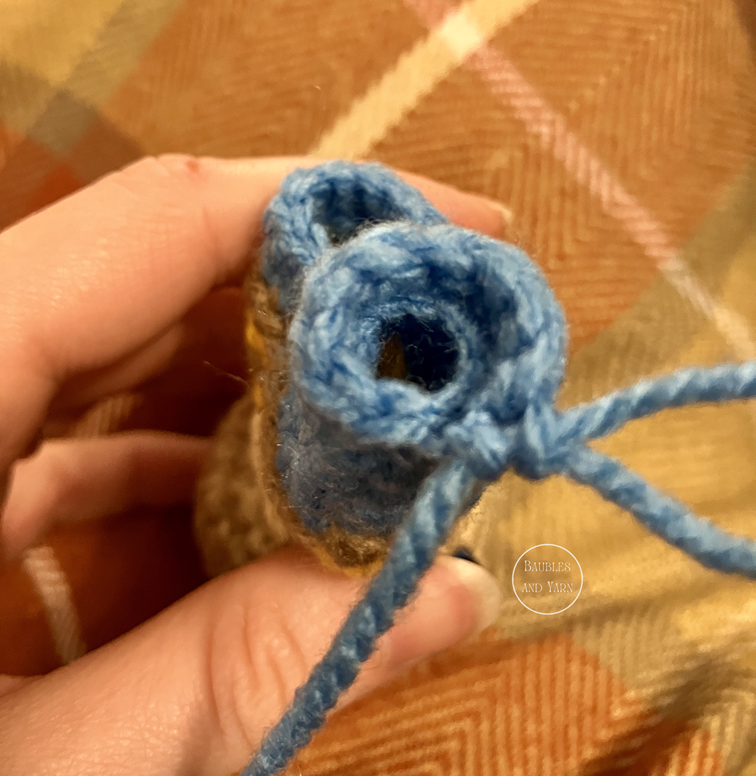
We will be creating the legs by separating the 20 stitches of the body into two legs of 10 stitches each.
Round 22: 4 sc, 1 sc in the middle stitch on the front of the scarecrow, 5 sc in the remaining stitches. (10)
Rounds 23-24: Sc around. (10)
Round 25: In the front loops only, sc around. (10)
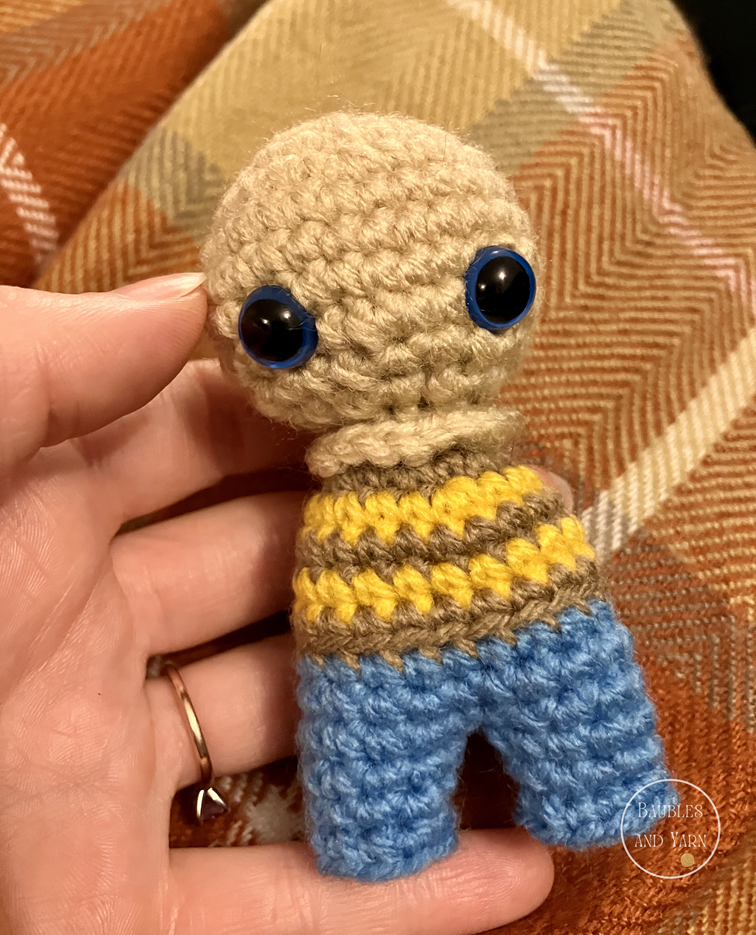
Cut off yarn leaving a tail for sewing. Stuff the leg and the body. Weave the yarn to the inside of the leg and sew shut using the back loops created by row 25.
Join blue yarn back in row 21 on the side of the scarecrow. Repeat rounds 22-25 to create the second leg.
Arms:
Round 1: Leaving a tail for sewing, in brown, 6 sc in a magic circle. For easier sewing of the arms, don’t completely close the magic circle and pull the tail through it. (6)
Rounds 2-5: Alternating between yellow and brown, 6 sc. (6)
Round 6: In yellow, 6 sc in the front loops only. (6)
Cut and tie off. Since the hole is so small and that we will be gluing hay into it, there is no need to sew it shut. Attach the arm to the body. Repeat to create the second arm.
Overalls:
Worked in rows back and forth.
Row 1: Ch 7.
Row 2: Starting in the second ch from the hook, 1 sc in every stitch. (6)
Row 3: Ch 1 and turn. 1 dec, 2 sc, 1 dec. (4)
Row 4: Ch 1 and turn. 4 sc. (4)
Row 5: Ch 10 to create one side of the overalls’ strap.
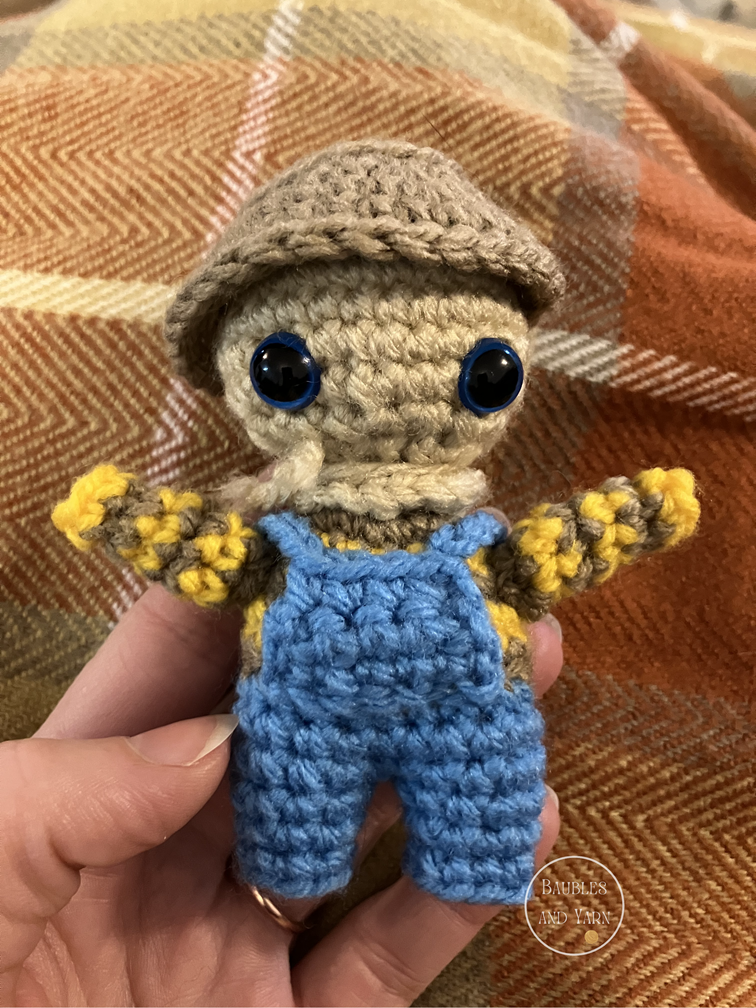
Cut off leaving a tail for sewing. Attach the longer side to the front of the scarecrow in the front loops created by row 20. Be sure to leave the top open to glue in hay.
Row 6: Ch 10 to create the second strap and attach to the other side of the overalls.
Hat:
Round 1: In brown, 6 sc in a magic circle. (6)
Round 2: Inc around. (12)
Round 3: (1 sec, 1 inc) repeat around. (18)
Round 4: Sc around. (18)
Round 5: In the back loops only, sc around. (18)
Round 6: (2 sc, 1 inc) repeat around. (24)
Round 7: (3 sc, 1 inc) repeat around. (30)
Round 8: Sc around. (30)
Round 9: In the front loops only, sc around (30).
Cut and tie off. Pull the sides and lift the rim to help shape the hat.
Finishing touches:
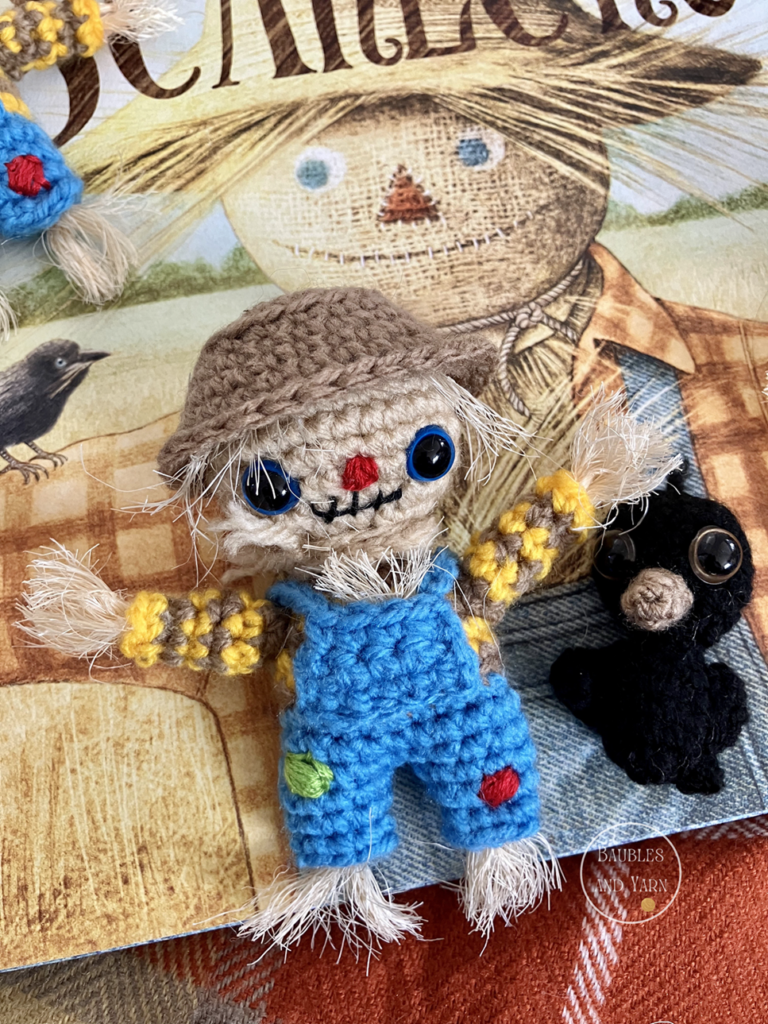
Glue some hay, sisal, or even yarn under the hat, in the front of the overalls, at the end of the arms, and at the end of the legs. Glue the hat. You can also add beige yarn and tie it around the neck. Finally, use embroidery thread or yarn to add face details and patches to the overalls.
Crow Crochet Pattern:
Materials:
- 3mm hook
- 10mm safety eyes
- Black and brown yarn. I used light (3) acrylic yarn.
- Stuffing material
- Scissors
- Needles
- Stitch marker
Finished size: Approx. 6cm tall.
Terms and abbreviations (US Terms):
- Chain (ch)
- Single crochet (sc)
- Increase (inc)
- Decrease (dec)
- Half double crochet (hdc)
- Double crochet (dc)
- Treble crochet (tr)
Head & Body:
Round 1: In black, 6 sc in a magic circle. (6)
Round 2: Inc around. (12)
Round 3: (1 sc, 1 inc) repeat around. (18)
Rounds 4-6: Sc around. (18)
Round 7: (1 sc, 1 dec) repeat around. (12)
Insert safety eyes between rows 5 and 6, about 4 stitches apart.
Round 8: Dec around. (6)
Stuff head.
Rounds 9-10: Sc around. (6)
Round 11: Inc around. (12)
Rounds 12-14: Sc around. (12)
Stuff body.
Round 15: Dec around (6).
Cut yarn leaving a tail and sew shut. Once the hole is closed, weave the yarn to the top of the head and cut, leaving a few mm to create the head feathers.
Tail:
Ch 4, dc in 1st foundation chain, ch 1, tr in the same 1st foundation chain, ch 1, dc in the same 1st foundation chain, ch 4 and slip stitch in the same 1st foundation chain. Cut yarn and attach to the back of the body.
Wings:
Ch 6, slip stitch in 2nd chain from hook, sc in next st, hdc in next stitch, dc in next st, tr in the last st. Cut off leaving a tail for sewing and attach to the body. Repeat to create the second wing.
Beak:
Round 1: In brown, 3 sc in a magic circle. (3) Since the beak is very small, the stitches have a tendency to curl outwards, make sure that they are placed in the right position.
Round 2: Sc around. (3)
Round 3: Sc, sc, inc. (4)
Cut off leaving a tail for sewing and attach to the head.
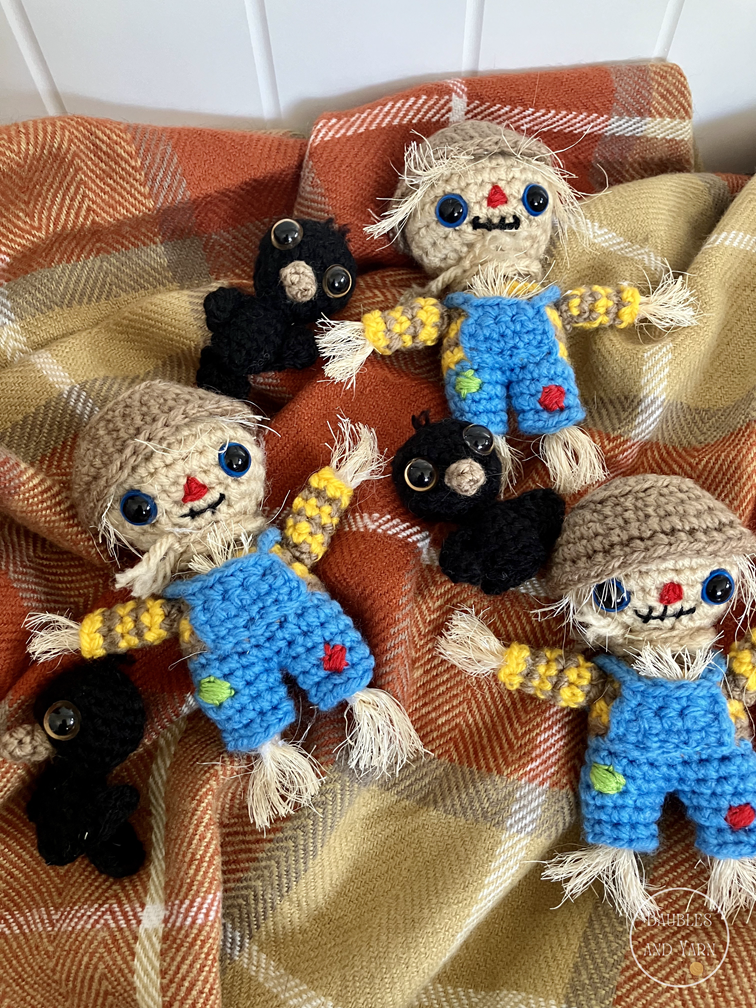
I hope you enjoyed making these Fall Scarecrow and Crow Amigurumi – Free Crochet Patterns. I would be so thrilled to see your creations so please be sure to tag me on Instagram so I can see and share them.
This pattern was designed by Baubles and Yarn. You may sell finished items made from this pattern but please include credits to Baubles and Yarn.
Until next time, happy crocheting!


One comment on “Fall Scarecrow and Crow Amigurumi – Free Crochet Patterns”